
If a users in unable to clock in, it may be because the clock is not set to accept data from users at a certain location.
Each clock can be set up to allow users to clock in/out from specific locations. Users are assigned a location and the clock can then be set to accept users to clock in/out from all locations or just specific ones.
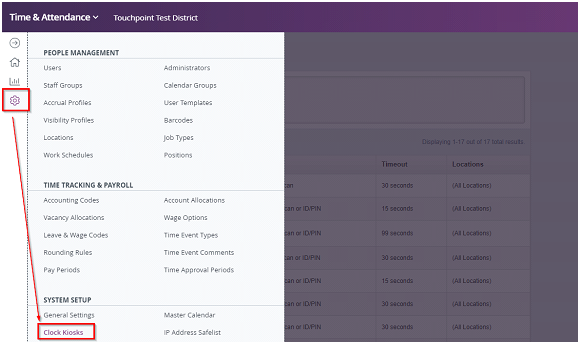
Log into the Frontline Time & Attendance portal. Click Configure on the left hand side then choose Clock Kiosks.
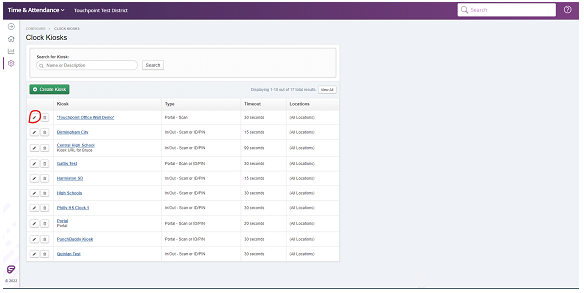
Then click the edit icon (pencil) for the clock you want to configure.
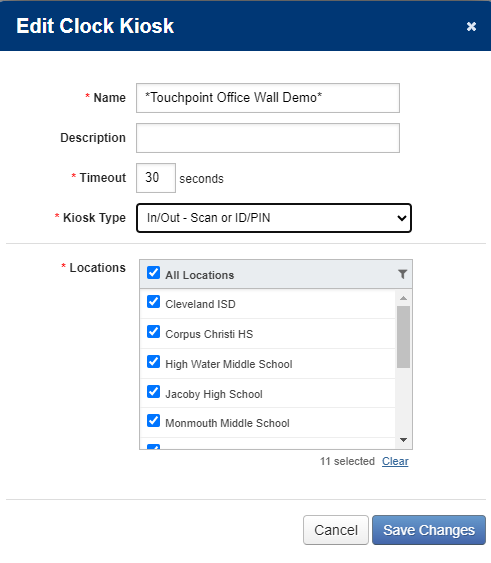
This will open a new window and you can make changes to the name, kiosk type and locations.
Differences Between Kiosk Types
Three of them are Portal kiosks, and three are In/Out kiosks.
Each one of these types launches a different ‘variation’ of the system Web Clock.
- The Portal – ID/PIN Kiosk: with this Web Clock, users enter their own absence management ID and PIN # into the fields provided on the Web Clock to identify themselves to the system. Then the users click on the [Clock In] button to clock into their shifts … or… the [Clock Out] button to clock out of their shifts.
- The Portal – Scan Kiosk: this Web Clock requires you to connect a USB Barcode Scanner to a computer. Then, you must create User Barcodes and distribute them to your users. The Web Clock displays the message, “Waiting for a Scan…“. The users will be able to scan their time and attendance barcodes across the scanner connected to that system's ‘Kiosk’ Computer to identify themselves to the time and attendance system (i.e.–to “Log in”), and then they will click on the [Clock In] button to clock into their shifts .. or… the [Clock Out] button to clock out of their shifts.
- The Portal – Scan or ID/PIN Kiosk: this Web Clock displays the message, “Waiting for a Scan…” alongside another ‘message’, “Login using your ID & PIN“. This kiosk type is ideal for users that may have forgotten their barcodes … in which case they can log in using their absence and substitute management ID & Pin, and then click on the [Clock In] button to clock into their shifts … or… the [Clock Out] button to clock out of their shifts. This is the recommended kiosk type.
- The In/Out – ID/PIN Kiosk: with this Web Clock, users enter their own absence management ID and PIN # into the fields provided on the Web Clock to identify themselves to the system. If they have only one position and Time Event Type, the time and attendance system will automatically clock them in. If they have more than one option, they will be prompted to specify before clicking “In.”
- The In/Out – Scan Kiosk: this Web Clock is the one that displays the message, “Waiting for a Scan…". The difference between this one, and #2 and #3 (above), is that this one scans users in/out of their shifts without requiring the users to actually click on a [Clock In] button or on a [Clock Out] button if the user has only one position and Time Event Type as an option.
- The In/Out – Scan or ID/PIN Kiosk: this Web Clock displays the message, “Waiting for a Scan…“ alongside another ‘message’, “Login using your ID & PIN”. This kiosk type is ideal for users that may have forgotten their barcodes … in which case they can log in using their absence management ID & Pin. This kiosk differs from the Portal - Scan or ID/PIN Kiosk in that users will be automatically clocked in if they have only one Position or Time Event Type as an option. If they have more than one option, they will be prompted to specify before clicking “In.”